Download our aestheticPhoto + Video app
Cart
Congratulations! Your order qualifies for free shipping Spend $100 more for free shipping
Your cart is empty.
Continue browsing
Shipping & taxes calculated at checkout
Results for mr-kates-home-tour/
Filter
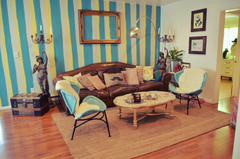
mr. kate's home tour
episode 1 of the mr. kate web show!
OMG We Bought A House!
OMG We Bought A House! Episode 2: Plan and Paint
Are Cookies OK?
We use cookies to improve your browsing experience